
Embroidery Settings
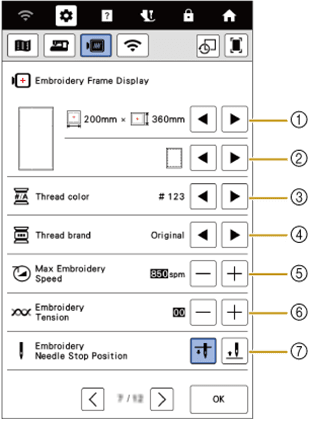
- Select the embroidery frame to be used.
- Select the center point marker or grid lines.
- Select the thread color display on the embroidery screen; thread number, color name.
- Select the thread brand of the thread color display.
- Adjust the maximum embroidery speed.
- Adjust the upper thread tension for embroidering.
- Select the needle stop position (the needle position when the machine is stopped) to be up or down during embroidery.
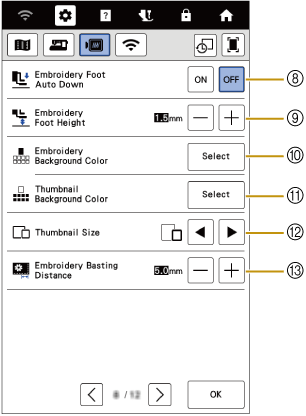
- When set to [ON], pressing the “Start/Stop” button when the embroidery foot is raised automatically lowers the embroidery foot before starting embroidering.
- Select the height of the embroidery foot during embroidering.
- Select the color of the background for the embroidery display area.
- Select the color of the background for the thumbnail area.
- Select the size of pattern thumbnails.
- Adjust the distance between the pattern and the basting stitching.
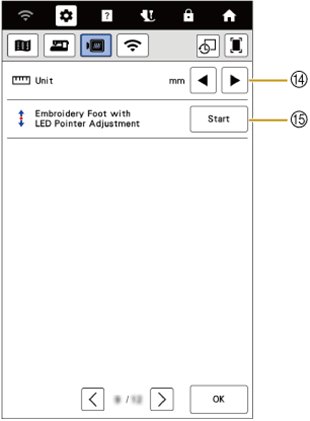
- Select the display units for embroidering (mm/inch).
- Adjust the position of the embroidery foot "UH+" with LED pointer (this setting is available if embroidery foot “UH+” with LED pointer has been attached).