
The 2-Point Embroidery Positioning Function
By using the 2-point embroidery positioning function, the embroidering position can easily be aligned.
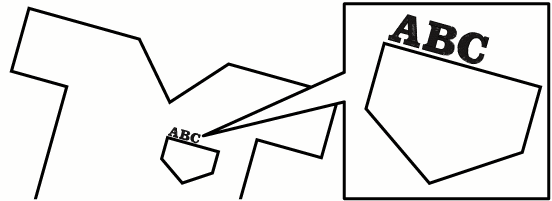
This is useful when embroidering in an area where it is necessary to align the pattern, as shown below.
Use a chalk pencil to mark the desired embroidering position.
The line drawn for the reference direction should be longer.
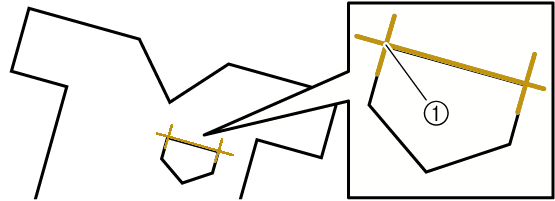
- Chalk pencil mark
If the desired position of the pattern can be clearly established, such as when embroidering along a pocket, it is not necessary to mark the position with a chalk pencil.
Hoop the fabric in the embroidery frame.

When hooping the fabric in the embroidery frame, make sure that the embroidery pattern will fit within the embroidering area of the frame being used.
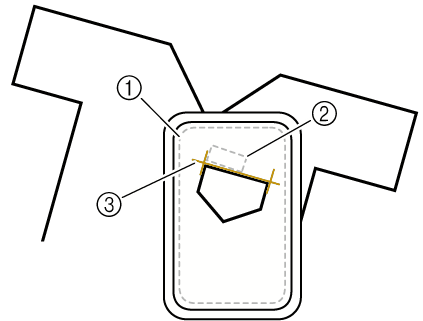
- Embroidering area
- Embroidery pattern size
- Chalk pencil mark
Select the pattern.
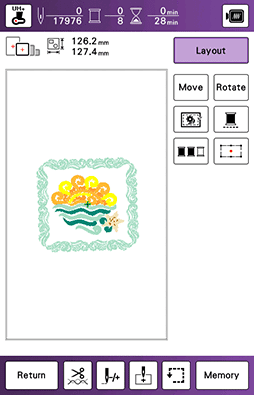
Touch [Embroidery] to display the embroidery screen.
Touch [Layout] and then touch
 .
.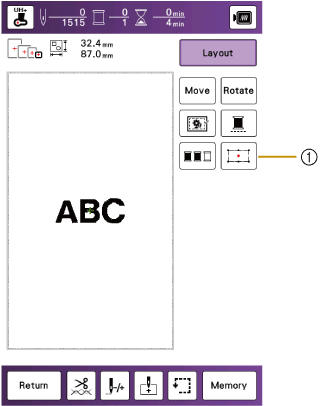
- Switch on/off the 2-point embroidery positioning function.
This function can be used without an LED pointer. In that case, refer to the needle drop point instead of the light of the LED pointer.
- The LED pointer lights up to indicate the needle drop point.
- When the LED pointer is turned on, the embroidery foot height is automatically adjusted according to the fabric thickness.
- If the surface of the fabric is too uneven or rough, check and adjust the alignment of the light of the LED pointer and the needle drop point before starting to embroider.
If a message appears, indicating that the move and rotate settings will return to the original ones, touch [OK].
From the reference points shown in the screen, select the point to be used for aligning the pattern.
For this example, select the point in the lower-left corner of the pattern.
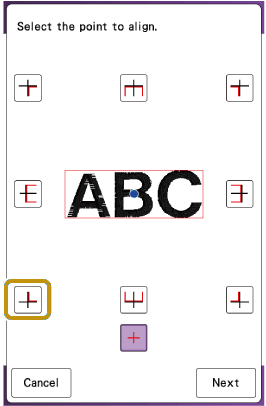
Touch [Next].
Select the direction (from the reference point) to be used as a reference for aligning the pattern.
For this example, select the arrow pointing to the right as the reference direction.
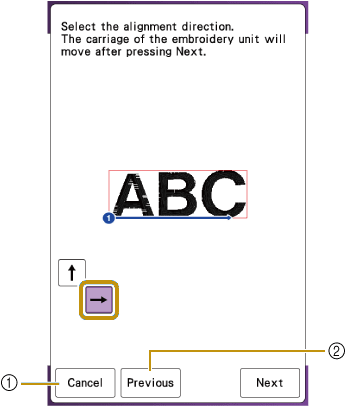
- Cancel the pattern alignment settings.
- Return to the previous screen.
Touch [Next].
Touch the positioning keys to move the embroidery frame until the position of the LED pointer and the first point are aligned.
To change the speed that the frame moves, use the frame movement speed keys. If it is difficult to make a precision alignment, touch a frame movement speed key for a slower speed.
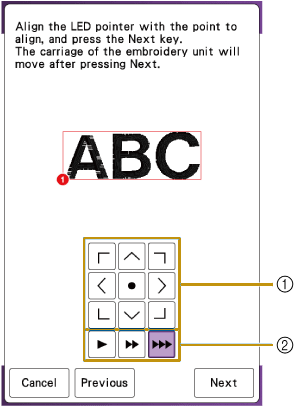
- Positioning keys
- Frame movement speed keys
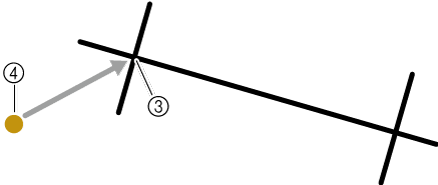
- First point
- Light of the LED pointer
If
 is displayed to the left of the positioning keys, the LED pointer has shifted from its initial position. Touch to adjust the position.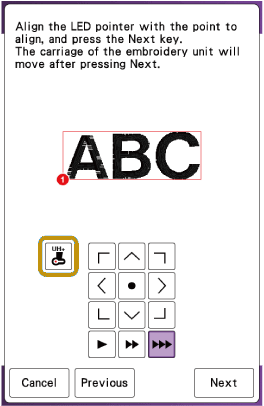
Touch [Next].
Touch the positioning keys to move the embroidery frame until the position of the LED pointer is aligned with the reference direction line (as there is no second point marked).
To change the speed that the frame moves, use the frame movement speed keys. If it is difficult to make a precision alignment, touch a frame movement speed key for a slower speed.
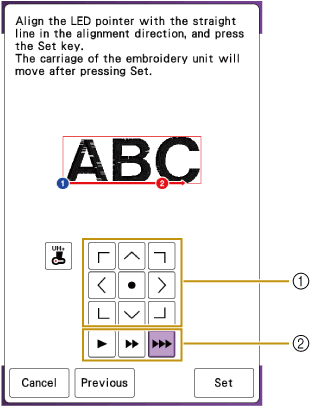
- Positioning keys
- Frame movement speed keys
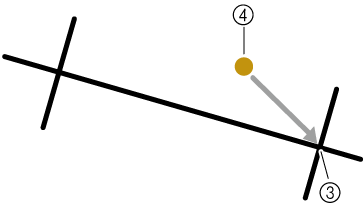
- Second point along reference line
- Light of the LED pointer
- Set the position of the LED pointer to a position that is not too close to the first reference point. If it is too close, a message will appear, prompting you to reposition it.
- In order to increase the accuracy of the pattern alignment, align the position of the LED pointer above the second point (3) and as far away from the first point as possible.
Touch [Set].
- The pattern is repositioned.
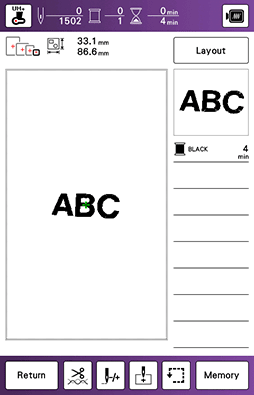
Press the “Start/Stop” button to start embroidering.
Another example
By specifying an alignment point and direction, embroidery patterns can be positioned and aligned for various purposes.
In this example, a pattern is aligned at the left center of the towel.

Use a chalk pencil to mark the desired embroidering position.
The line drawn for the reference direction should be longer.
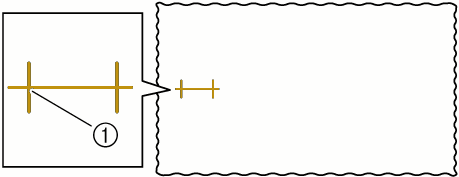
- Chalk pencil mark
Hoop the fabric in the embroidery frame.

Select the pattern.
Touch [Embroidery] to display the embroidery screen.
Touch [Layout] and then touch
.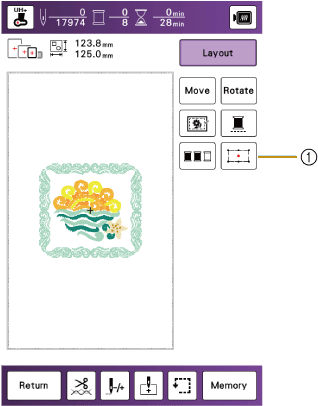
- Switch on/off the 2-point embroidery positioning function.
If a message appears, indicating that the move and rotate settings will return to the original ones, touch [OK].
From the reference points shown in the screen, select the point to be used for aligning the pattern.
For this example, select the point in the lower-center of the pattern.
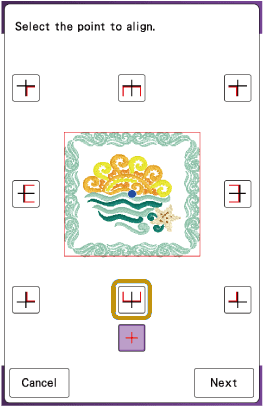
Touch [Next].
Select the direction (from the reference point) to be used as a reference for aligning the pattern.
For this example, select the arrow pointing upward as the reference direction.
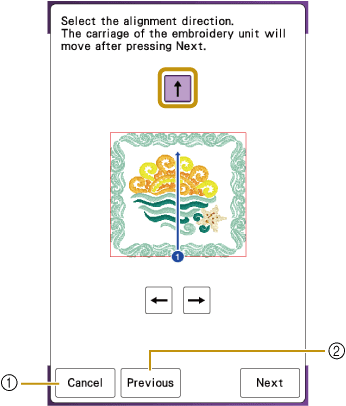
- Cancel the pattern alignment settings.
- Return to the previous screen.
Touch [Next].
Touch the positioning keys to move the embroidery frame until the position of the LED pointer and the first point are aligned.
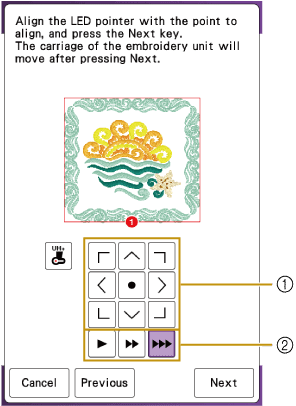
- Positioning keys
- Frame movement speed keys
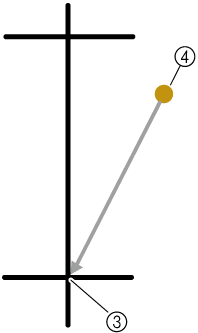
- First point
- Light of the LED pointer
Touch [Next].
Touch the positioning keys to move the embroidery frame until the position of the LED pointer is aligned with the reference direction line (as there is no second point marked).
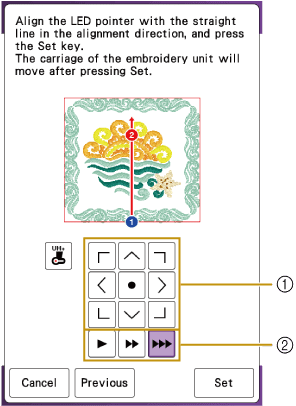
- Positioning keys
- Frame movement speed keys
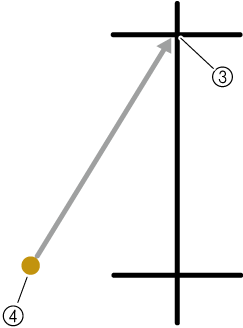
- Second point along reference line
- Light of the LED pointer
Touch [Set].
- The pattern is repositioned.
- The pattern is repositioned.
Press the “Start/Stop” button to start embroidering.