
Creating an Appliqué Piece
Creating an appliqué piece is convenient for fabrics that cannot be embroidered or when you wish to attach an appliqué to a garment.
The following pattern will be used to create an appliqué piece.

- Felt or denim fabrics are recommended to make the appliqué piece. Depending on the pattern and fabric used, lighter weight fabrics may cause the stitching to appear smaller.
- For best results, be sure to use stabilizer material for embroidering.
- When making appliqué pieces, do not use the optional border embroidery frame. Depending on the pattern density and fabric used, shrinkage of the stitching may occur.
Select the pattern, and edit it if necessary.
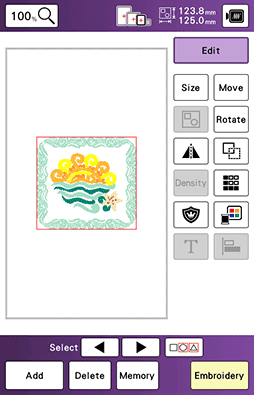
- Finish combining and editing the pattern before selecting the appliqué setting. If the pattern is edited after selecting the appliqué setting, the appliqué stitching and pattern may become misaligned.
- Since an outline is added, the pattern for an appliqué piece (when the appliqué setting is selected) will be larger than the original pattern. First, adjust the size and position of the pattern as shown below.
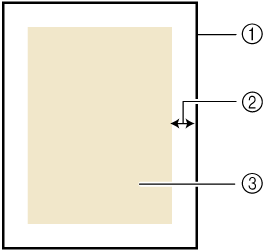
- Embroidering area
- About 1cm (approx. 1/2 inch)
- Pattern size
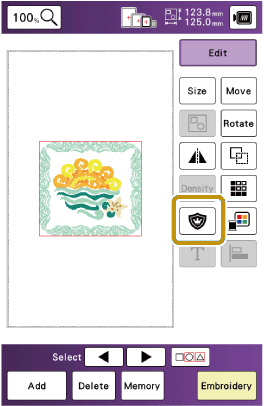
Touch [Edit], and then touch
 .
.
Specify the distance between the pattern and the appliqué outline, and then touch [OK].
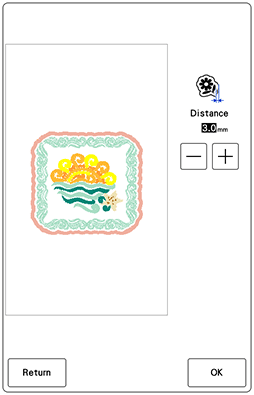
- The pattern and appliqué outline are grouped.
Touch [Embroidery].
- The steps for creating the appliqué piece are added to the embroidering order.
- Three steps are added to the embroidering order: appliqué cutting line, position of pattern placement on the stabilizer material, and appliqué stitching.
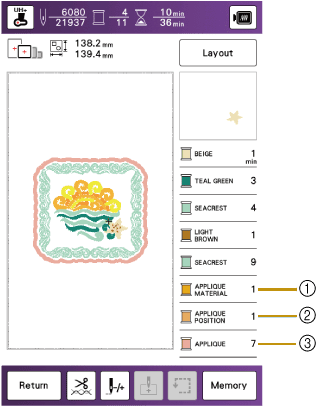
- Cutting line for appliqué
- Position of pattern placement on stabilizer material
- Appliqué stitching
- When setting the [Thread color] to [#123] (thread number) in the settings screen, the following screen is displayed.

An appliqué piece cannot be created if the pattern is too large or too complicated or a combined pattern is separated. Even if the selected pattern fits within the embroidering area, the entire appliqué pattern may exceed the embroidering area when the outline is added. If an error message appears, select a different pattern or edit it.
Fuse or stick a piece of stabilizer to the back of the felt or denim fabric to be used as the appliqué piece.
Hoop the fabric for the appliqué piece in the embroidery frame, attach the embroidery frame to the machine, and then start embroidering.
After the pattern is embroidered, thread the machine with the thread for the cutting line, and then sew the cutting line (APPLIQUE MATERIAL).
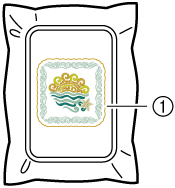
- Cutting line for appliqué
We recommend using thread for the cutting line that is closest to the color of the fabric.
Remove the fabric for the appliqué piece from the embroidery frame, and then carefully cut along the stitching. After cutting, carefully remove all of the cutting line thread.
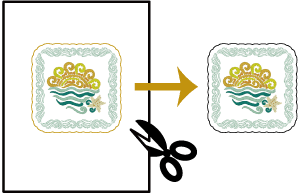
- Depending on the pattern density and fabric used, there may be shrinking of the pattern, or the appliqué may be misaligned with the placement line. We recommend cutting slightly outside of the cutting line.
- When using patterns that are vertically and horizontally symmetrical, use a chalk pencil to indicate the pattern orientation before cutting it out.
- Carefully cut out the pattern on the outline you just sewed. Do not cut inside the cutting line, otherwise the appliqué fabric will not be caught by the appliqué stitch.
Use two layers of adhesive water soluble stabilizer material with their sticky sides together, and then hoop them in the embroidery frame.
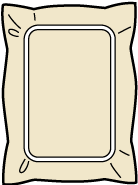
- If water soluble stabilizer is used, it is not necessary to remove the stabilizer material after sewing the appliqué outline. To reduce shrinkage of the pattern, we recommend using water soluble stabilizer.
- Put together two layers of water soluble stabilizer, otherwise the stabilizer material may tear during embroidering.
Thread the machine with the thread for the outline, and then sew the placement line for the appliqué position (APPLIQUE POSITION).
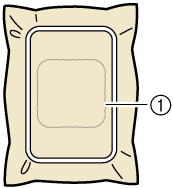
- Pattern placement line
Lightly apply glue or spray adhesive, and paste the appliqué piece so that it aligns with the placement line.
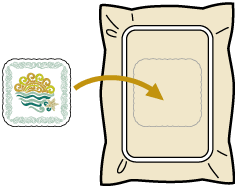
Before pasting the appliqué piece down, make sure the appliqué piece is positioned correctly within the placement line.
With the machine threaded using the thread for the outline from step 10, embroider the outline (APPLIQUE).
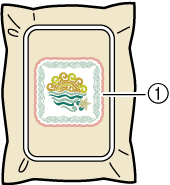
- Outline of appliqué piece
- The outline is sewn using satin stitching.
- Since glue may become attached to the presser foot, needle or needle plate, clean off any glue after finishing embroidering the appliqué pattern.
After embroidering is finished, remove the stabilizer material from the embroidery frame.
Use scissors to cut the excess water soluble stabilizer from outside the appliqué outline.
Soak the appliqué piece in water to dissolve the water soluble stabilizer.

Dry the appliqué piece, and then iron it if necessary.
Do not apply a strong force when ironing, otherwise the stitching may be damaged.