
Upper Threading
 CAUTION
Be sure to thread the machine properly. Improper threading can cause the thread to tangle and break the needle, leading to injury.
- Never use a thread weight of 20 or lower. It may cause the machine to malfunction.
- Use the needle and the thread in the correct combination. For details on the correct combination of needles and threads, refer to “Fabric/Thread/Needle Combinations”.
- When using 65/9 needle, manually thread the needle. If the automatic needle threading function is used, the unit may be damaged.
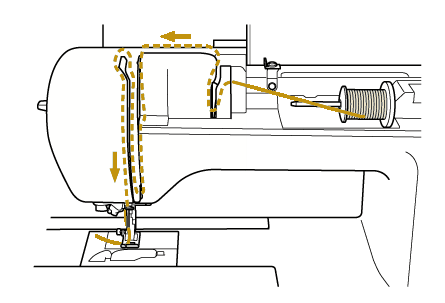
- When threading the upper thread, carefully follow the instructions.
Turn on the machine.
Press
 (Needle position button) once or twice to raise the needle.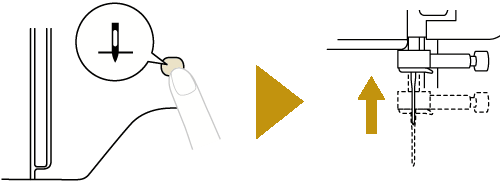
Touch
 .
.- When the message [OK to automatically lower the presser foot?] appears on the LCD screen, touch [OK] to continue.
- The screen changes, and all keys and operation buttons are locked (except ).
CAUTIONWhen threading the needle, be sure that you have touched
on the operation panel to lock all keys and buttons, otherwise injuries may occur if the “Start/Stop” button or any other button is pressed and the machine starts.Raise the presser foot lever to raise the presser foot.
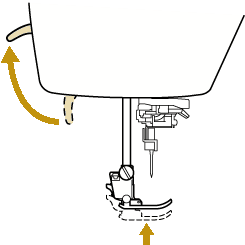
If the presser foot is not raised, the machine cannot be threaded.
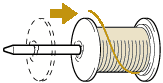
Remove the spool cap and place the spool of thread onto the spool pin.
Slide the spool onto the spool pin so that the thread unwinds to the front from the bottom. Otherwise, the thread may become tangled around the spool pin.
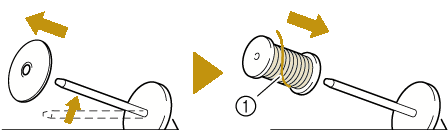
- The thread unwinds to the front from the bottom.
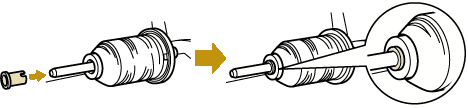
Slide the spool cap onto the spool pin.
Slide the spool cap as far as possible to the right, as shown, with the rounded side on the left.
 CAUTION
Choose a spool cap that best fits the size of spool being used.
If the spool or the spool cap is not positioned correctly, the thread may become tangled around the spool pin, possibly causing the needle to break, resulting in injuries.
While holding the thread near the spool, pass the thread through the thread guide cover. And then, pass the thread under the thread guide plate, and pull it up.
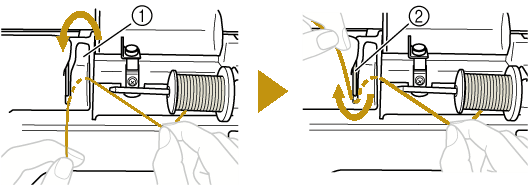
- Thread guide cover
- Thread guide plate
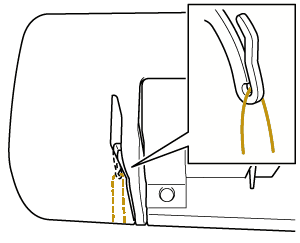
While holding the thread passed under the thread guide plate, pass the thread through the thread channel in the order shown below.
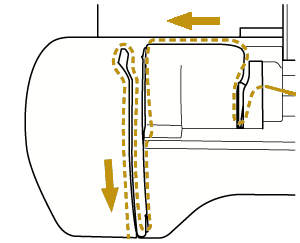
- If the presser foot has been lowered and the shutter is closed, the machine cannot be threaded. Be sure to raise the presser foot to open the shutter before threading the machine. In addition, before removing the upper thread, be sure to raise the presser foot to open the shutter.
- This machine is equipped with a window that allows you to check the position of the take-up lever. Look through this window and check that the thread is correctly fed through the take-up lever.
Slide the thread behind the needle bar thread guide.
The thread can easily be slid behind the needle bar thread guide by holding the thread in your left hand, then feeding the thread with your right hand, as shown. Make sure that the thread is passed through to the left of the tab of the needle bar thread guide.
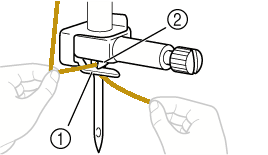
- Needle bar thread guide
- Tab
Check that the needle and thread are compatible with the needle threader. If they are compatible, continue with the next step.
- The needle threader can be used with machine needles 75/11 through 100/16.
- The needle threader cannot be used with the wing needle or the twin needle.
- When thread such as transparent nylon monofilament or specialty threads are used, it is not recommended to use the needle threader.
- For most embroidery applications, the upper thread should be 40-weight rayon or polyester embroidery thread.
- If the needle threader cannot be used, insert the thread through the eye of the needle from front to back by hand. At this time, be sure to lock all keys and operation buttons described in step 3.
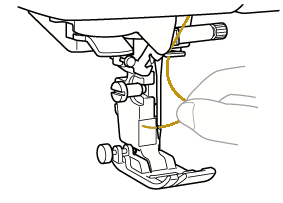
Pull the end of the thread, which has been passed through the needle bar thread guide, to the left, then pass the thread through the notch of the threader thread guide, and then firmly pull the thread from the front and insert it into the slit of the threader thread guide disk marked “7” all the way.
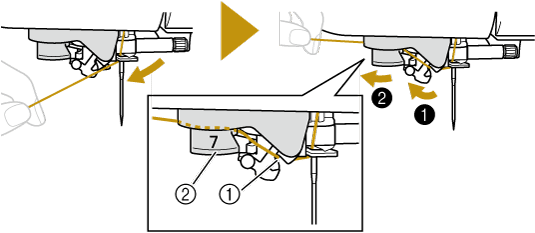
- Notch of the threader thread guide
- Threader thread guide disk
Lower the presser foot lever to lower the presser foot.
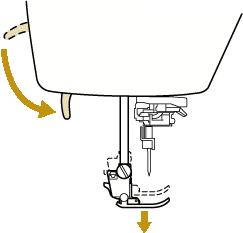
Cut the thread with the thread cutter on the left side of the machine.
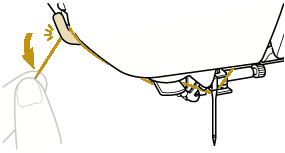
When using thread that quickly winds off the spool, such as metallic thread, it may be difficult to thread the needle if the thread is cut.
Therefore, instead of using the thread cutter, pull out about 8 cm (approx. 3 inches) of thread after passing it through the threader thread guide disk (marked “7”).Lower the needle threader lever on the left side of the machine until it clicks, and then slowly return the lever to its original position.
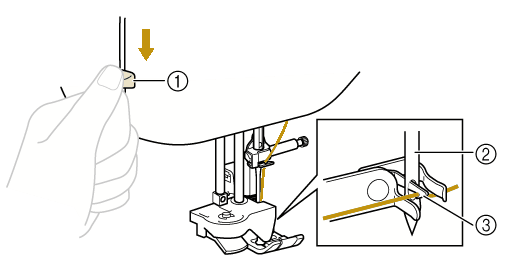
- Needle threader lever
- Needle
- Hook
If the needle is not raised to its highest position, the needle threader cannot thread the needle. If the needle is not at the highest position, refer to step 2 and press
(Needle position button) to raise the needle.Carefully pull the end of thread that was passed through the eye of the needle.
If the needle was not completely threaded, but a loop in the thread was formed in the eye of the needle, carefully pull the loop through the eye of the needle to pull out the end of the thread.
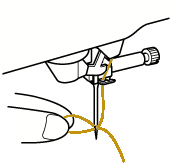
Raise the presser foot lever, pass the end of the thread through and under the presser foot, and then pull out about 10 cm (approx. 4 inches) of thread toward the rear of the machine.
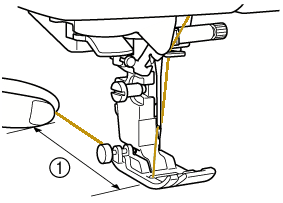
- About 10 cm (approx. 4 inches)
Touch
 to unlock all keys and buttons.