
Button Sewing
Buttons with 2 or 4 holes can be attached using the machine.
Do not use the automatic thread cutting function when sewing buttons. Otherwise, you will lose the thread ends.
Select the stitch below.

- The feed dogs are lowered automatically.
Raise the presser foot.
Attach button fitting foot “M”, slide the button along the metal plate and into the presser foot, and lower the presser foot.
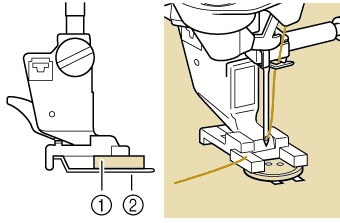
- Button
- Metal plate
Rotate the handwheel toward you (counterclockwise) to check that the needle goes into each hole correctly.
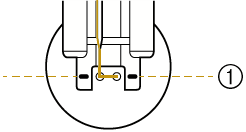
- Align the buttonholes with the marks on button fitting foot “M”.
If the needle does not reach the holes on the left side, adjust the stitch width.
Gently hold the end of the upper thread and start sewing.
- The machine stops automatically when sewing is finished.
IMPORTANTMake sure the needle does not strike the button during sewing.
To attach the button more securely, repeat the process.
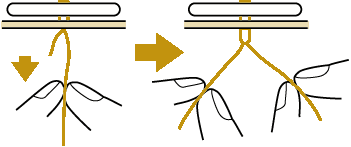
From the wrong side of the fabric, pull the end of the bobbin thread to pull the upper thread through to the wrong side of the fabric. Tie the two thread ends together and cut the threads.
After the button is attached and the button is no longer in the button fitting foot “M”, select another stitch and rotate the handwheel toward you (counterclockwise) to raise the feed dogs.