
Method 1: Begin Changing the Angle at the End of Sewing by Pressing the “Reverse Stitch” Button
Touch
 , then
  , and then select a stitch pattern for stitch tapering.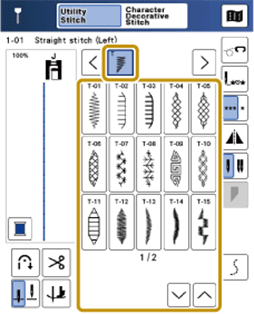
If necessary, change the stitch width and stitch length.
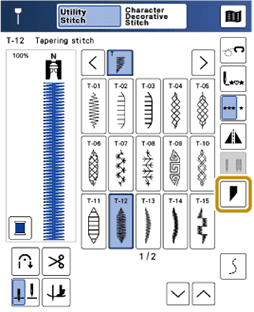
Touch
 .
.
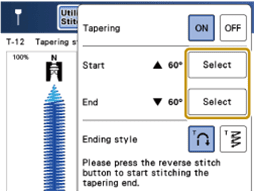
Touch [Select], select the angle settings for the start and end of sewing, and then touch [OK].

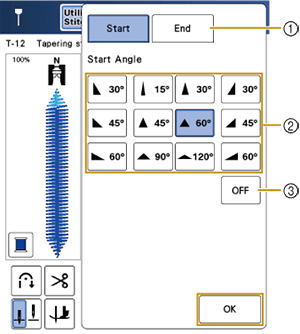
- Select the start or end of sewing.
- Select an angle.
- Specify that the angle does not change.
Select the method for finishing sewing. For this example, since the angle at the end of sewing will begin changing when
 (Reverse stitch button) is pressed, select
  .
.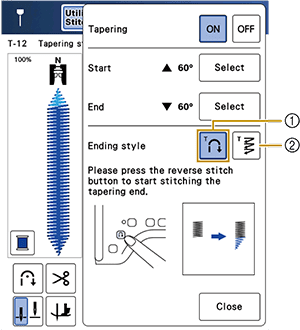
- Press (Reverse stitch button) for the angle at the end of sewing to start changing; the machine stops when sewing is finished.
- The machine stops when the specified number of stitch patterns have been sewn. The number of stitch patterns that are specified includes the number of patterns used to change the angle.
- Press
If necessary, use a chalk pencil to draw a line at the location to be sewn.
Start sewing.
After sewing the desired length, press
(Reverse stitch button).
- When (Reverse stitch button) is pressed, the angle at the end of sewing begins to change, and the machine stops when sewing is finished.
If you stop sewing at the point where end tapering should begin (either by pressing the “Start/Stop” button or by lifting your foot from the foot controller), press
(Reverse stitch button) and resume sewing by either pressing the “Start/Stop” button or pressing on the foot controller. End tapering will begin as soon as sewing resumes.- When
When finished sewing, set [Tapering] to [OFF], and then touch
 .
.