
External Guideline Marker
Attaching the External Guideline Marker
Touch
 (Presser foot/Needle exchange key) to lock all keys and buttons.
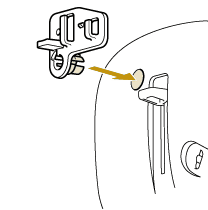
Firmly insert the cord holder into the hole above the needle threader lever.
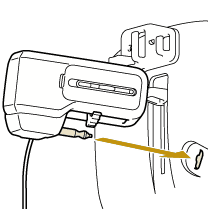
Firmly insert the external guideline marker into the slot on the left side at the front of the machine.
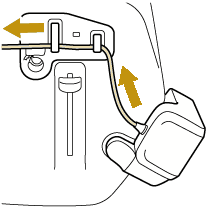
Route the cord of the external guideline marker along the top of the cord holder and through the two hooks, and then pass the end of the cord to the back of the machine.
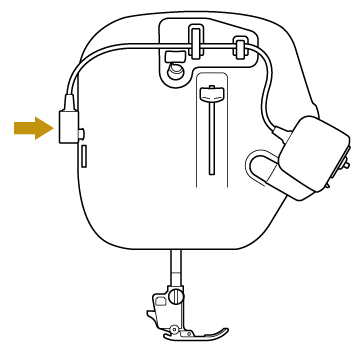
Insert the plug at the end of the cord into the jack on the machine.
Touch
(Presser foot/Needle exchange key) to unlock all keys and buttons.
Activating the Guideline Marker
Display the stitch selection screen.
Touch
 .
.- The guideline marker function is turned on, and the guideline marker is projected.
The key indicates the status of the guideline marker function.
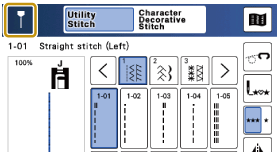
: Guideline marker function is off.
 : Guideline marker function is on.
 : External guideline marker is not connected to the machine.
Adjusting the Guideline Orientation
After installing the external guideline marker, adjust the orientation of the guideline so that it aligns with the marking on the bobbin cover. If your bobbin cover does not have any markings, replace it with one that does.
Replace the bobbin cover with one that has markings. Before replacing, touch
(Presser foot/Needle exchange key) to lock all keys and buttons.
Correct the orientation of the guideline with the corrector until the guideline is parallel with the markings on the bobbin cover.
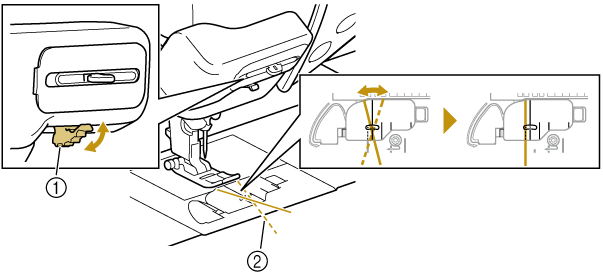
- Corrector
- Guideline
Move the slider left or right to align the guideline with the sewing position.
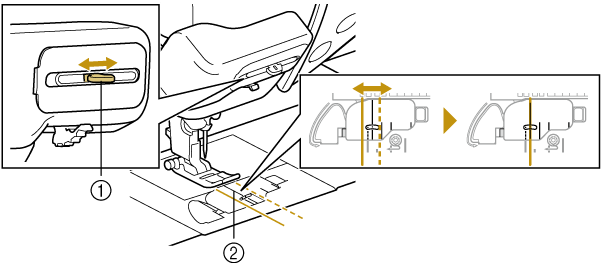
- Slider
- Markings on the bobbin cover
When changing the position of the guideline, use the slider. Do not use the corrector.
Adjust both the corrector and slider to fine-tune the orientation and position of the guideline.
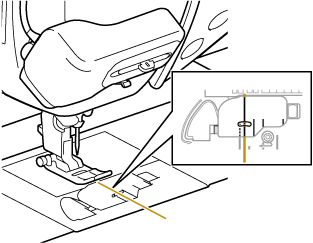
Changing the Position of the Guideline
Move the guideline while referring to the guideline scale.
Attach the guideline scale to the external guideline marker.
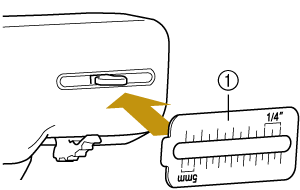
- Guideline scale
- The scale is pre-attached on the external guideline marker.
- The back of the scale is magnetic, so it can be attached or detached from the external guideline marker.
- The scale has two measurement units: millimeters and inches.
Attach the scale so that the measurement unit that you want to use is at the top.
Move the guideline scale to align a guideline scale line with the mark (▲) on the slider.
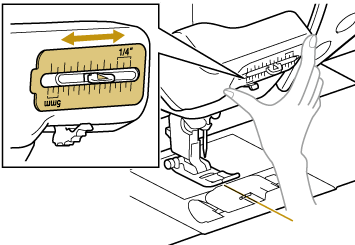
- Align a guideline scale line with the mark on the slider.
- Aligning the reference point with a marking on the bobbin cover will make it easier to change the guideline position.
While referring to the guideline scale line, move the guideline with the slider.
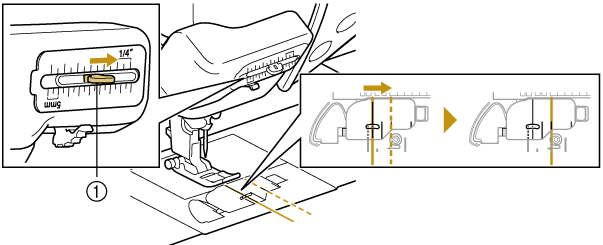
- Slider
- Aligning the guideline with the marking on the bobbin cover is also useful.