Spool Stand
The spool stand is useful when using thread spools with a large diameter (cross-wound thread) and when performing embroidery couching. The spool stand can hold two spools of thread.
1 | 2 | 3 |
4 | 5 | 6 |
7 | 8 | 9 |
10 |
- Telescopic thread guide
- Upper section of spool support
- Lower section of spool support
- Spool pin × 2
- Screw and washer
- Spool cap (XL) × 2
- Spool holder × 2
- Spool cap base × 2
- Spool felt × 2
- Ring × 4
- Do not lift the handle of the machine while the spool stand is installed.
- Do not push or pull the telescopic thread guide or spool pins with extreme force, otherwise damage may result.
- Do not place any object other than spools of thread on the spool support.
- Do not try to wind thread on the bobbin while sewing using the spool stand.
Assembling the Spool Stand
Fully extend the telescopic thread guide shaft, and then rotate the shaft until the two internal stoppers click into place.

Assemble the spool support by placing the upper section on top of the lower section. Align the notches on the upper section with the three tabs on the lower section and push them down firmly. Make sure that the screw hole in the lower section is aligned with the screw hole at the center of the upper section.

Insert the telescopic thread guide into the round hole at the center of the spool support, and then use a screwdriver to securely tighten the screw from the reverse side.
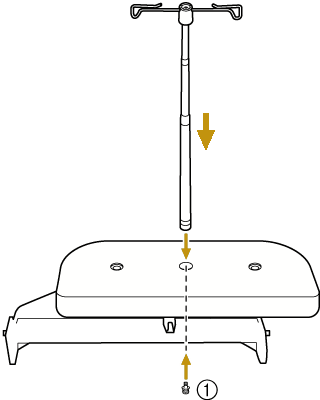
- Screw
Make sure that the stoppers on the telescopic thread guide shaft are firmly in place and that the thread guide openings are directly above the two holes for spool pins in the spool support. In addition, check that the shaft is securely tightened in the spool support.

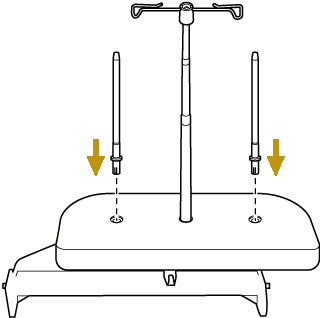
Firmly insert the two spool pins into the two holes in the spool support.
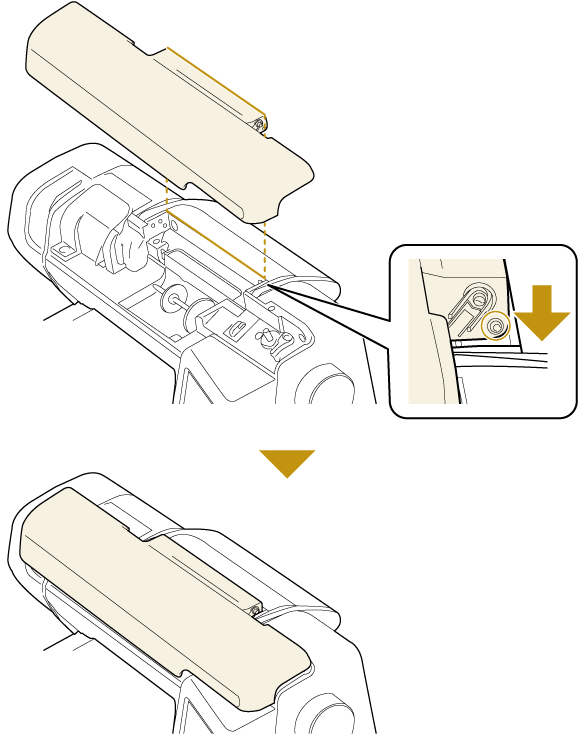
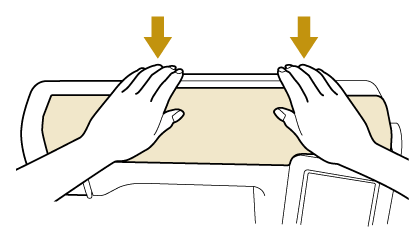
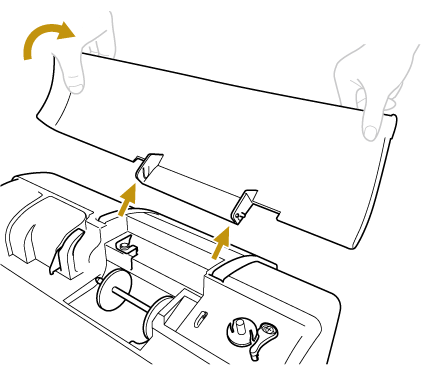
Open the top cover of the machine. Firmly push the top cover further toward the back of the machine to remove it.
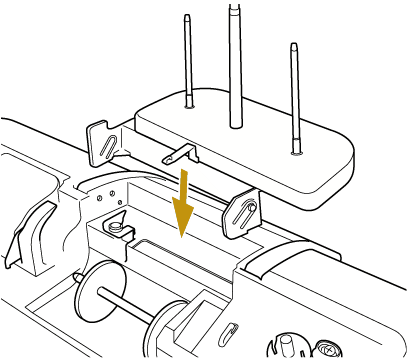
Install the spool stand so that its projections are aligned with the notches on the machine where the top cover was attached.
Thread Spool and Spool Cap for the Spool Stand
Be sure to use a spool cap (1) that is slightly larger than the spool.  |
When using thread on a thin spool, place the included spool felt (1) on the spool pin, place the thread spool on the spool pin so that the center of the spool is aligned with the hole at the center of the spool felt, and then insert the spool cap onto the spool pin. 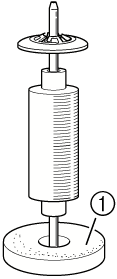 |
When using a cone spool that is taller than the spool pin, use the spool holder (1). When using cone shaped thread spool with other than cotton thread, it is not necessary to use spool caps.  |
When using fluffy thread such as cotton thread, place a spool cap (1) on the spool cap base (2), as shown in the illustration. Depending on the size of spool or the amount of thread remaining, choose the appropriate sized spool cap. Spool cap (small) cannot be used with the spool cap base. 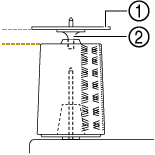 |
Threading with the Spool Stand
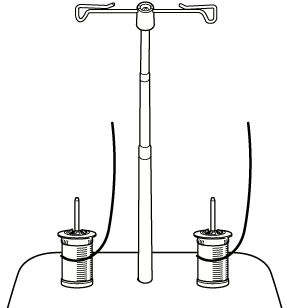
Place the thread spool on the spool pin so that the spool turns clockwise when the thread feeds off, and then firmly insert the spool cap onto the spool pin.
 CAUTION
Make sure that the spools do not touch each other, otherwise the thread will not feed off smoothly, the needle may break and cause injury. In addition, make sure that the spools do not touch the telescopic thread guide at the center.
- When using two spools of thread, make sure that both spools are feeding in the same direction.
- Make sure that the thread is not caught under the spool.
Pull the thread off the spool. Pass the thread from the back to the front through the thread guides at the top.
When using thread that quickly feeds off the spool, such as metallic thread, use the enclosed ring to prevent the thread from becoming entangled.
Threading sequence; Pull the thread from the spool, place the thread through the ring from the bottom up (1), into the thread guide (2) and through the ring from the top down (3). When using the ring, do not use the spool cap base.
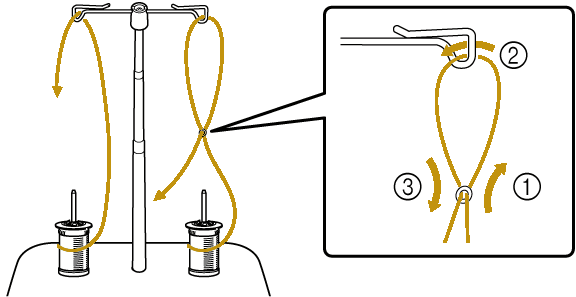
- Guide the thread so that it does not become entangled with the other thread.
- After feeding the thread as instructed, wind any excess thread back onto the spool, otherwise the excess thread will become tangled.
Pass the thread through the machine’s thread guide from the right to the left.
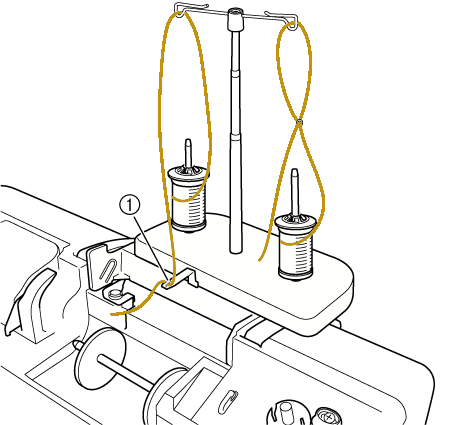
- Thread guide
Thread the machine according to the steps 7 to 17 of the following link.
Removing the Spool Stand
While pushing the tab (①) on the left side of the spool stand, remove the stand from the machine.
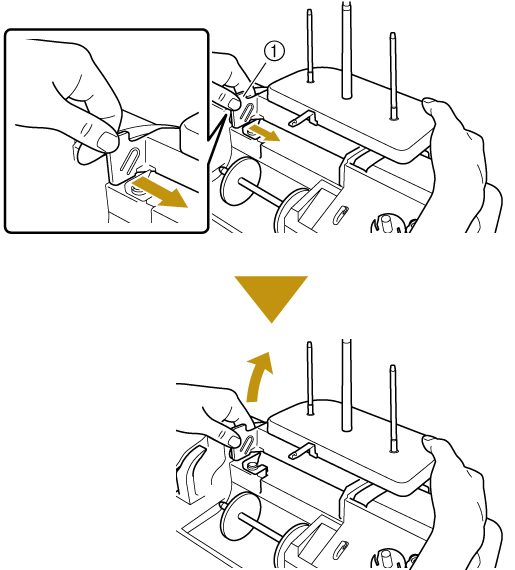
Insert the two projections of the top cover slightly into the notches on the machine. Ensure the cover is lying flat, and then push it firmly into place.