
Embroidering Functions
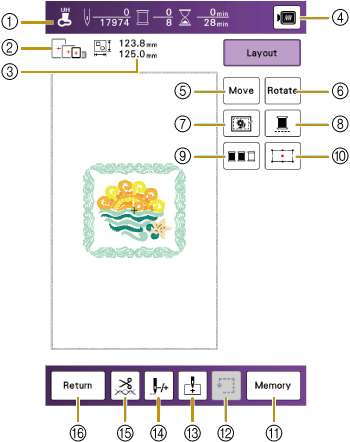
Using these keys, you can move or rotate pattern, etc.
Touch [Layout] to display the editing window.
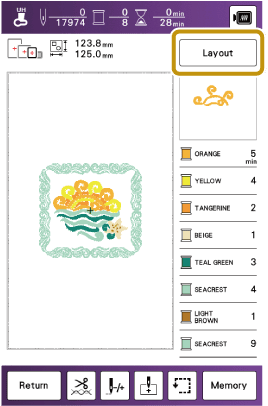

Some operations or functions are not available for certain patterns. If the key display is grayed out, you cannot use that function or operation with the selected pattern.
- Needle point check key
Turn on the light of the LED pointer.
Touch this key to check the needle drop point with the light of the LED pointer.
Checking the Needle Drop Point with the Embroidery Foot “UH+” with LED Pointer
- Available frames
Shows the embroidery frames that can be used for the selected pattern.
Be sure to use the proper frame.
- Pattern size
Shows the size of the selected pattern.
- Image key
Preview the embroidery image.
- Move key
Move the pattern.
 :Shows the distance between the embroidering position and the center (when the embroidery pattern is moved).
 - Rotate key
Rotate the pattern.
 :Shows the degree of rotation of the pattern.
 - Basting key
Add the basting stitch around the pattern. You can select the distance from the pattern to the basting stitching.
- Uninterrupted embroidery key
Change the setting to embroider the pattern with a single color.
Touch the key again to return to the original setting.
Even if uninterrupted embroidering
 has been set, the automatic thread cutting function and the thread trimming function can be used.
The icons of the spool of thread are grayed out.
- Thread color sorting key
- 2-point embroidery positioning function on/off key
Switch on/off the 2-point embroidery positioning function.
- Memory key
Save the pattern to the machine’s memory or USB media. The pattern can also be transferred to a computer via a wireless network connection.
- Trace key
Check the position of the pattern.
- Starting point key
Specify the needle start position.
- Forward/Back key
Move the needle forward or back in the pattern; useful if the thread breaks while embroidering or if you want to start again from the beginning.
If the Thread Breaks or the Bobbin Runs out of Thread During Embroidering
- Cut/Tension key
Set automatic thread cutting or the thread tension. For embroidery, these functions are set automatically.
Using the Automatic Thread Cutting Function (End Color Trim)
- Return key
Return to the edit screen.