
Embroidery Couching
 CAUTION
When using yarn, we recommend selecting yarn of weight 4 (MEDIUM  ). Medium yarn is often referred to as worsted weight, 20 knitted stitches per 10 cm, or 9-11 wraps per inch. The diameter of the yarn is approximately 2-3 mm (approx. 1/12-1/8 inch). If the yarn is extremely thin or thick, has an unusual shape (flat or furry), or more than 2 plies, the best finishing results may not be achieved, or injuries or damage may result.
Preparing for Embroidery Couching
Turn off the machine.
Attach the embroidery unit.
Install a bobbin wound with embroidery bobbin thread.
Turn on the machine.
Touch [Embroidery] in the home page screen.
Touch
 to lock all keys and buttons, and then raise the presser foot lever.
Remove the presser foot and attach the embroidery couching foot “Y”.
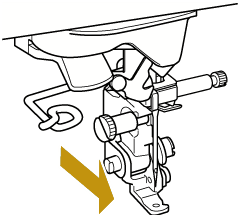 CAUTION
When using the embroidery couching foot “Y”, make sure the machine is in embroidery mode. Otherwise, the needle will strike the embroidery couching foot, causing the needle to break and possibly causing injury.
This specific design of the embroidery couching foot “Y” is exclusively for this product.
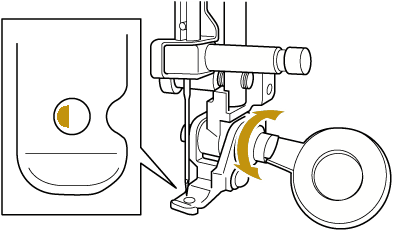
When embroidering couching patterns, use the presser foot included with this machine.Rotate the handwheel and check that the needle is in the left half of the hole in embroidery couching foot “Y”.
If the needle is not in the left half, turn the screw of embroidery couching foot “Y” to adjust the position of the embroidery foot. Turn the screw toward you to move the embroidery foot to the right. Turn the screw toward the back to move the embroidery foot to the left.
After making adjustments, rotate the handwheel and check that the needle does not touch the presser foot.
Attach the spool stand to the machine.
At this time, raise the telescopic thread guide shaft by about one level (refer to the height shown in the illustration).
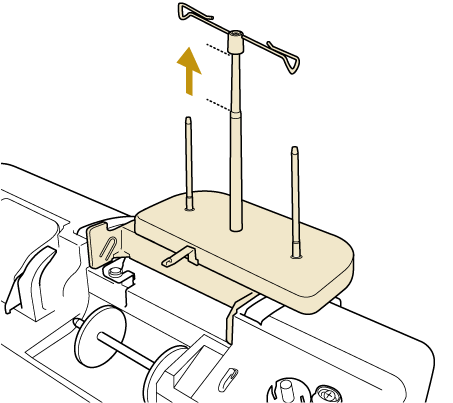
For details on attaching the spool stand, refer to the following.
Spool StandDo not extend the telescopic thread guide shaft of the spool stand to its maximum height. A lower thread guide height keeps the yarn twist steadier and reduces the chance of tangles.
Insert the yarn guide into the slot for extension accessory.
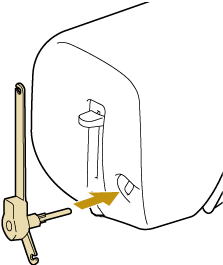
Pass the yarn through the telescopic thread guide and the yarn guide (1) to (2).
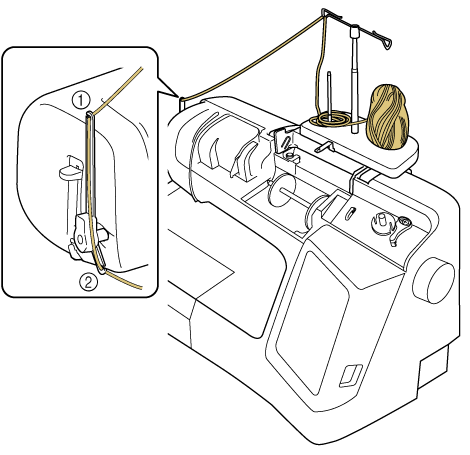
- Pull off an appropriate amount of yarn from the ball so that the yarn does not become taut.
- Make sure that the yarn does not become entangled as you work.
Pass the yarn through the guide on embroidery couching foot “Y”.
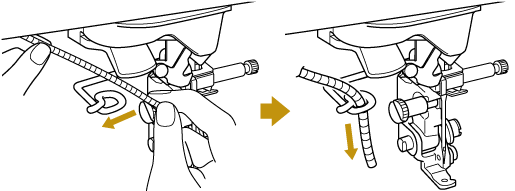
Thread the yarn through embroidery couching foot “Y”.
Pass the yarn through the loop in the yarn threader, and then pass the threader from top to bottom through the hole in embroidery couching foot “Y”. Pull the yarn to the front of the machine.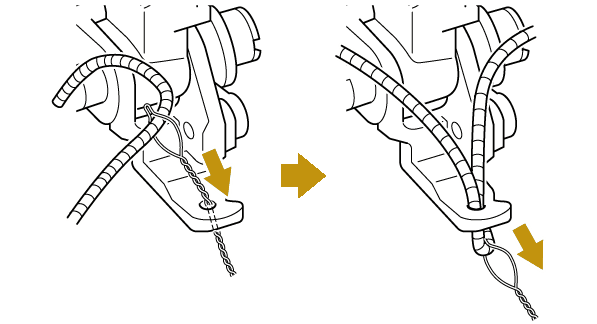
- Place a sheet of paper under the presser foot to smoothly pass the yarn threader through the hole in embroidery couching foot “Y”.
- It may be helpful to lower the embroidery couching foot “Y” after the yarn threader has passed through the foot if the yarn is snagging on the needle.
Touch
 to unlock all keys and buttons.
Selecting a Pattern and Upper Threading
Touch the category keys for couching patterns.
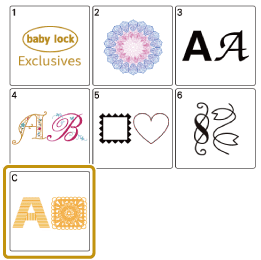


Select a pattern and touch [Set].
If not already done, install a bobbin with enough embroidery bobbin thread in the machine.
Thread the upper thread on the machine's spool pin.
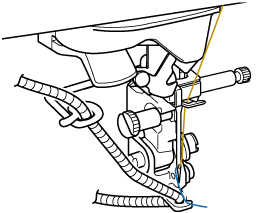
Do not use the spool stand for upper thread. Otherwise, thread may tangle with yarn.
For best results, use an upper thread that is the same color as the yarn.
Press
 (Presser foot lifter button) twice to raise the presser foot and then attach the embroidery frame to the embroidery unit.
Embroidering a Couching Pattern
Touch [Embroidery].
Make sure that about 20 cm (approx. 8 inches) of yarn is pulled to the front of the machine.
While holding the yarn in your hand in front of you, press the “Start/Stop” button.
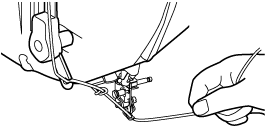 CAUTION
Pulling the yarn upwards may cause it to catch on the needle, causing it to break. Be careful not to allow the yarn to catch on the needle.
- Before embroidering, make sure that there is enough yarn, upper thread and bobbin thread.
- Make sure that the yarn passes smoothly through the guides. Unravel as much yarn from the ball as necessary so that the yarn does not become taut.
- Use yarn that has no knots.
After embroidering several stitches, release the yarn.
- When embroidering is finished, the machine will automatically trim the threads and stop.
When using a high-density yarn, the upper thread tension may be disturbed. If this happens, it is possible to improve it by raising the [Embroidery Foot Height] by about 1 mm (approx. 1/32 inch) on the settings screen.
Cut the yarn, leaving about 20 cm (approx. 8 inches).
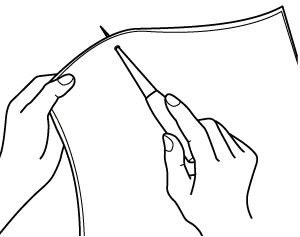
Punch a hole through the fabric with an awl or tapestry needle and then use the yarn threader to pull the excess yarn to the wrong side of the fabric.
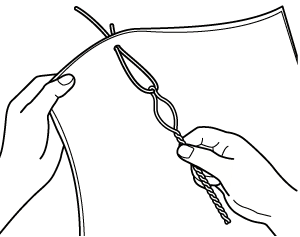
Tie the end of the yarn so it cannot be pulled out, and then use scissors to cut off any excess yarn.