
One-Step Buttonholes
With one-step buttonholes, you can make buttonholes appropriate to the size of your button.
One-step buttonholes are sewn from the front of the presser foot to the back, as shown below.
Before sewing a buttonhole, it is recommended to stabilize the fabric.
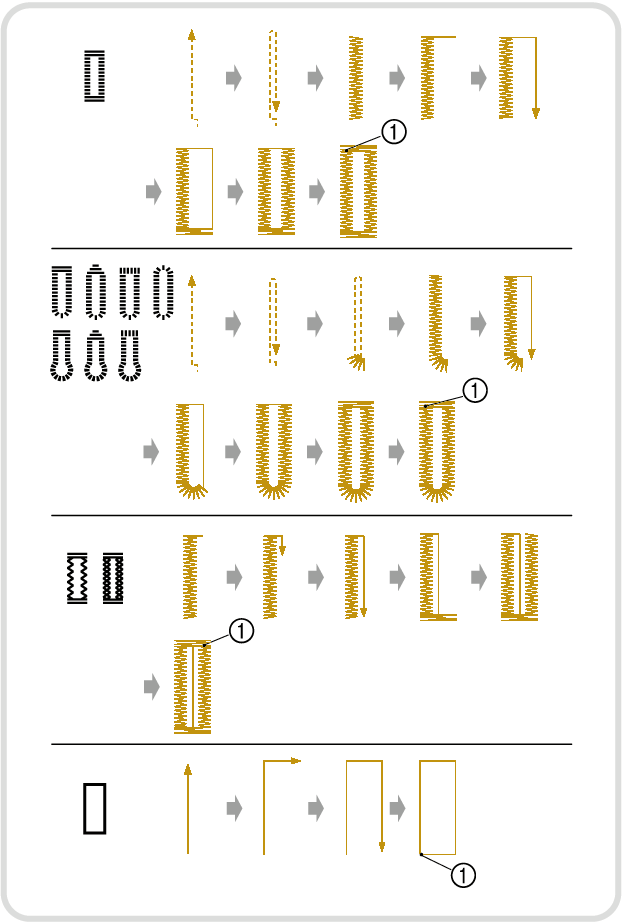
- Reinforcement stitching
Select from the stitches below, and attach buttonhole foot “A”.
Position the upper thread under the presser foot by guiding thread through the hole in the presser foot before attaching the buttonhole foot “A”.


Mark the position and length of the buttonhole on the fabric.
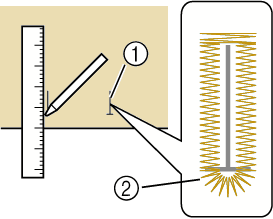
- Marks on fabric
- Buttonhole sewing
The maximum buttonhole length is about 28 mm (approx. 1-1/16 inches) (diameter + thickness of the button).
Pull out the button guide plate of buttonhole foot “A”, and then insert the button that will be put through the buttonhole.

Position the fabric with the front end of the buttonhole mark aligned with the red marks on the sides of the buttonhole foot, and then lower the presser foot lever.
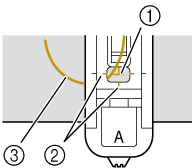
- Mark on fabric (front)
- Red marks on buttonhole foot
- Upper thread
When lowering the presser foot, do not push in the front of the presser foot.
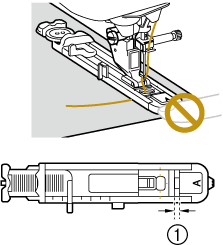
- Do not reduce the gap.
Pull down the buttonhole lever as far as possible.
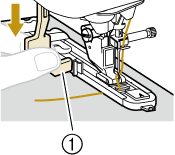
- Buttonhole lever
The buttonhole lever is positioned behind the bracket on the buttonhole foot.
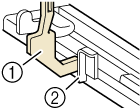
- Buttonhole lever
- Bracket
Gently hold the end of the upper thread in your left hand, and then start sewing.
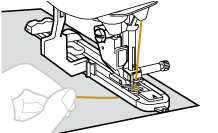
- Once sewing is completed, the machine automatically sews reinforcement stitches, then stops.
Press
 (Thread cutter button) once. Raise the presser foot, and then remove the fabric.
When using the thread cutter on the left side of the machine or scissors to cut the threads, press
 (Needle position button) to raise the needle, raise the presser foot, and then pull out the fabric before cutting the threads.
Raise the buttonhole lever to its original position.
Insert a pin along the inside of one bar tack at the end of the buttonhole stitching to prevent the stitching from being cut.
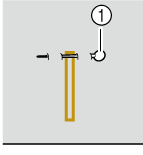
- Pin
Use the seam ripper to cut towards the pin and open the buttonhole.
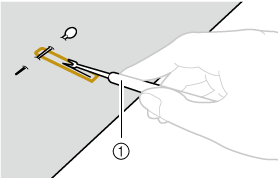
- Seam ripper
For keyhole buttonholes, use the eyelet punch to make a hole in the rounded end of the buttonhole, and then use the seam ripper to cut open the buttonhole.
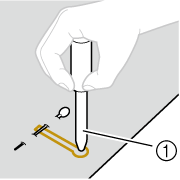
- Eyelet punch
When using the eyelet punch, place thick paper or some other protective sheet under the fabric before punching the hole in the fabric.
 CAUTION
When using the seam ripper to open the buttonhole, do not put your hand or finger in the path of the ripper. The ripper may slip and cause injury.
Sewing Buttonholes on Stretch Fabrics
Attach stabilizer material to the back of stretch fabrics to prevent them from stretching.
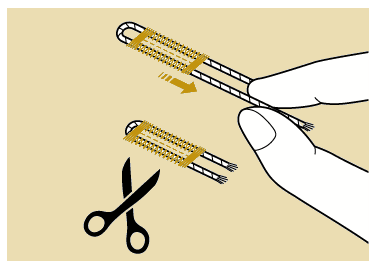
When sewing on stretch fabric with stitch 4-09 or 4-10, sew the buttonhole stitches over a gimp thread.
Hook the gimp thread onto the part of buttonhole foot “A” shown in the illustration.
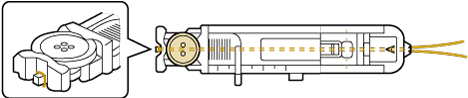
It fits into the grooves, and then loosely tie it.
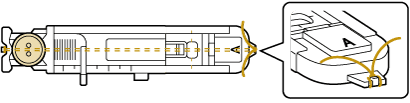
Adjust the stitch width to the thickness of the gimp thread.
Lower the presser foot lever and the buttonhole lever, and then start sewing.
Once sewing is completed, gently pull the gimp thread to remove any slack, and trim off any excess.
Odd Shaped Buttons/Buttons that Do Not Fit into the Button Holder Plate
Add together the diameter and thickness of the button, and then set the button holder plate to the calculated length. (The distance between the markings on the presser foot scale is 5 mm (approx. 3/16 inch).)
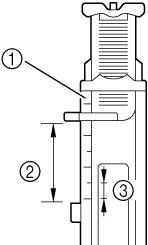
- Presser foot scale
- Length of buttonhole (diameter + thickness of button)
- 5 mm (approx. 3/16 inch)
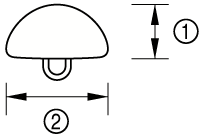
- 10 mm (approx. 3/8 inch)
- 15 mm (approx. 9/16 inch)