
Compact Digital Dual Feed Foot
The compact digital dual feed foot enables you to have best fabric control when sewing difficult fabrics that slip easily, such as quilted fabrics or fabrics that tend to stick to the bottom of a presser foot, such as vinyl, leather or synthetic leather.
When sewing with the compact digital dual feed foot, sew at medium to low speeds.
- When selecting stitches to be used with the compact digital dual feed foot, only the stitches that can be used will be activated on the display.
- When sewing fabric that easily sticks together, a more attractive finish can be achieved by basting the beginning of sewing.
Attaching the Compact Digital Dual Feed Foot
Remove the presser foot.
Loosen the screw of the presser foot holder to remove the presser foot holder.
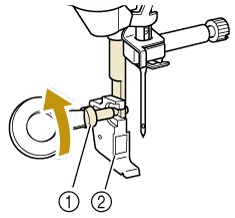
- Presser foot holder screw
- Presser foot holder
Position the compact digital dual feed foot to the presser foot bar by aligning the notch of the compact digital dual feed foot to the large screw.
Side view
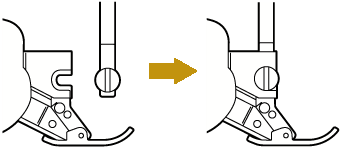
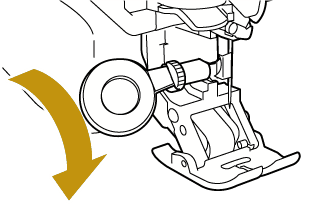
Hold the compact digital dual feed foot in place with your right hand, then using the disc-shaped screwdriver securely tighten the large screw.
 CAUTION
Use the included screwdriver to firmly tighten the screw. If the screw is loose, the needle may strike the presser foot and possibly cause injury.
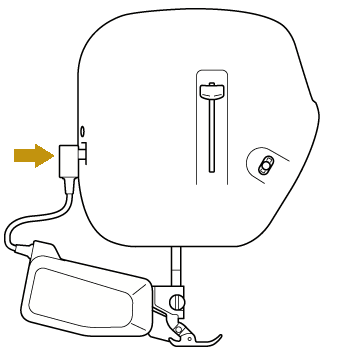
Plug the connector of the compact digital dual feed foot into the jack on the back of your machine.
Touch
 to unlock all keys and buttons.
- All keys and operation buttons are unlocked, and the previous screen is displayed.
Place the fabric under the compact digital dual feed foot with the needle at the starting point of the stitching.
Lower the presser foot.
Be sure that the feed position lever is pushed down and the compact digital dual feed foot is ready to sew.
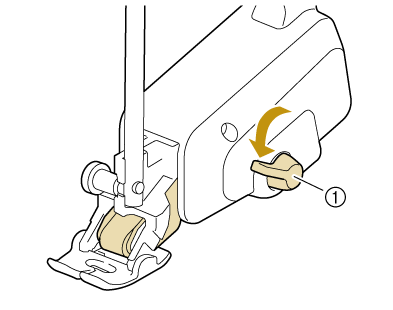
- Feed position lever
Do not operate the lever while sewing.
When the feed position lever is up, dual feed function is not effective. When the feed position lever is down, the black roller belt on the compact digital dual feed foot is engaged.
Attaching/Detaching Toe
Attach the toe by aligning the pins with the notches and snap it into place.
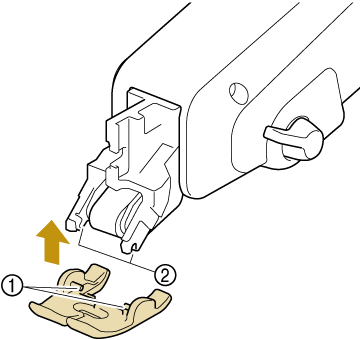
- Pins
- Notches
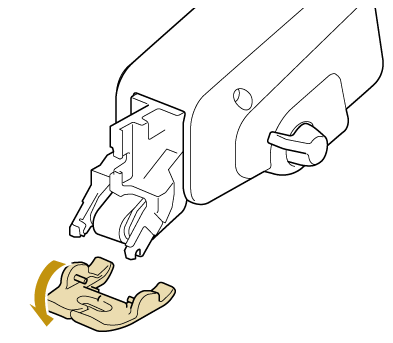
If you push down on the front and back part of the compact digital dual feed foot, the toe of the compact digital dual feed foot will snap off.
Adjusting the Amount of Fabric Feeding from the Compact Digital Dual Feed Foot
The dual feed mechanism pulls the top fabric according to the set stitch length. With troublesome fabrics, fine tune the set length, by changing [Dual Feed Feed Adjustment] in the settings screen.
As a default, some keys mentioned in the following procedures appear in light gray and are not available. To enable the keys for specifying the settings, attach the compact digital dual feed foot to the machine. The keys are enabled after the compact digital dual feed foot is detected.
Touch
 .
.- The settings screen appears.
Touch
 .
.- The sewing settings screen appears.
Display [Dual Feed Feed Adjustment] in the sewing settings screen.

Use
 or
or  to increase or decrease the feeding of the top fabric.
- Select [00] for sewing in most cases.
- If the feed amount for the top fabric is too little, causing the fabric to be longer than the bottom fabric, touch to increase the feed amount for the top fabric.
- If the feed amount for the top fabric is too much, causing the fabric to be shorter than the bottom fabric, touch to decrease the feed amount for the top fabric.
Touch [OK] to return to the original screen.